DRZ400S motorcycle dashcam
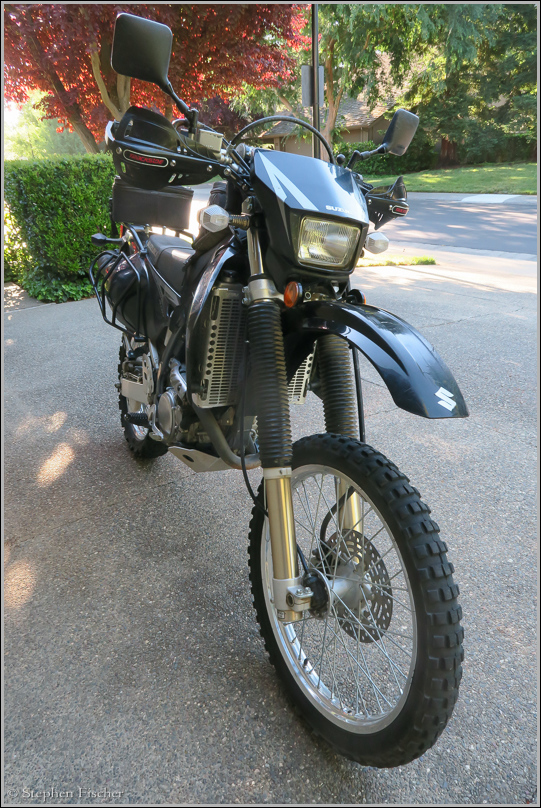
Innovv C3 on a Suzuki DRZ400S dual sport bike
After the successful installation and user experience of the Innovv C3 on my BMW F800GS, I decided to install a separate one on my Suzuki DRZ400S dual sport bike as well. This article will talk about the specifics of how I installed this on the DRZ400S, while leaving the discussion on the specifics of the Innovv C3 to the previous article pertaining to the installation on the F800GS.
To briefly reiterate, the Innovv C3 camera seems especially geared for the purpose as a motorcycle dashcam. It has a detachable, yet small waterproof video head on the end of a 4' cable that plugs into a separate recorder. The recorder can be configured to run continuously, overwriting the oldest footage in a looping manner, and to automatically start when you turn on the bike, and stop when the bike power is shut off. The recorder is quite small at about 2.5" x 1.5" x 1", but is not waterproof. It accepts a microSD card for storage just like a GoPro.
As mentioned previously, the advantage of this type of camera is that it is always running, capturing footage whenever the bike is on. WIth a 64G microSD card, about 11 hours of video history is captured, with the older footage being overwritten by the newest. This can be handy for capturing your last rides, or retrieving some specific event that may have occured such as a crash or accident. With the camera always on and powered by the bike, you never have to worry about remembering to turn the camera on or off, and whether you had it on when some specific event occured. For example, since installing this camera I have captured multiple crashes (in the dirt) of both myself and of other riders I happened to be following behind.
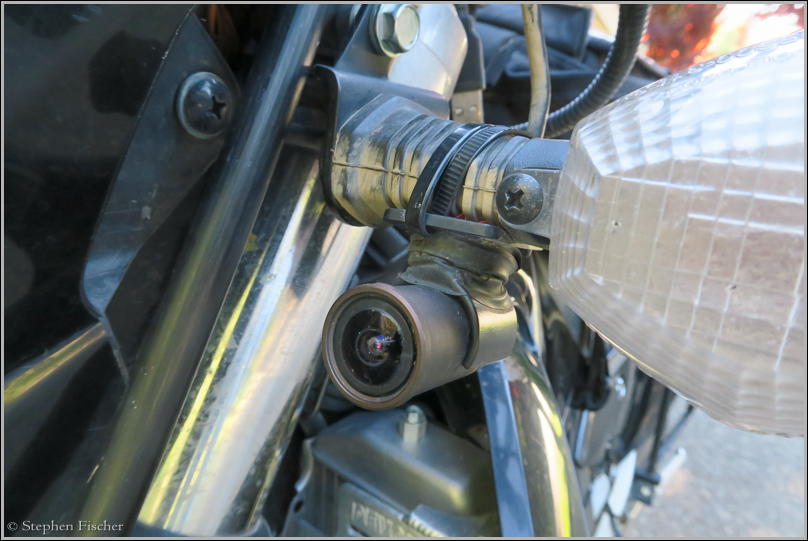
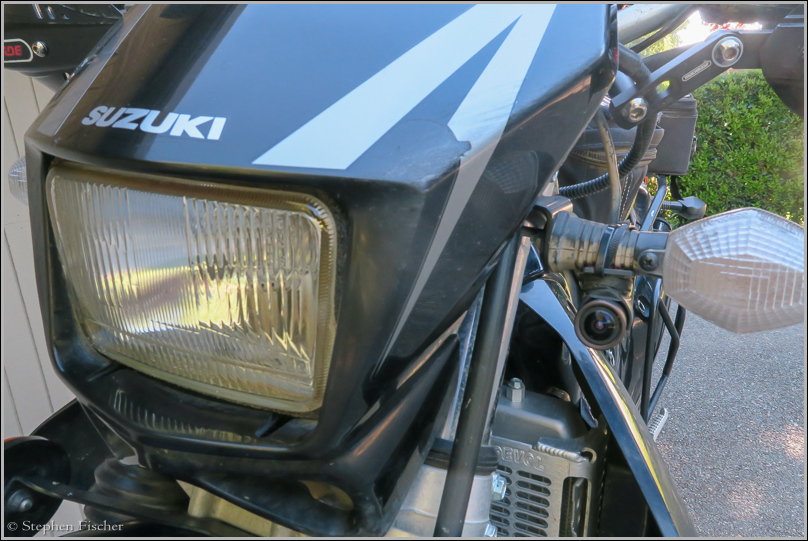
After examining my bike for the most effective installation, I decided to mount the camera head on the bottom of the left front turn signal light bracket, down where it will not be as noticeable, but still have reasonably good visibility of the road ahead, but being off to the side so as to not pick up too much debris thrown up by the front wheel. I also expect that this more obscure location will not be noticeable by others that may otherwise tamper or interfere with its operation. For the DRZ, this particular location is surprising stable for a camera mount, resulting in minimal vibration. The first and second pictures show how it is attached using the included holder with some double backed adhesive tape and zip ties.
 |
 |
 |
 |
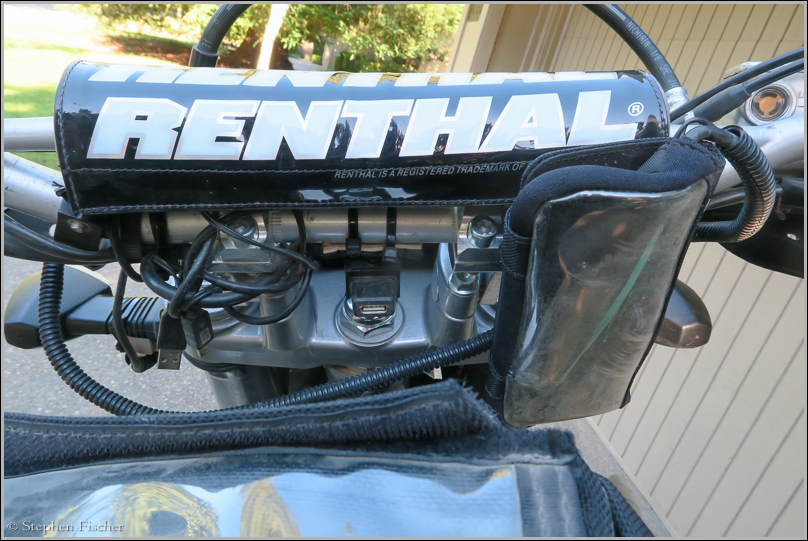
I placed the recorder in small aftermarket weather resistant smart phone holder intended for a bicycle. This is mounted on the handlebar with its included mount as shown in the third photo above. I picked this particular phone carry case from REI for about $20. Having the recorder on the handlebar makes it easier to access and retrieve the microSD card or to see if the camera is running. The recorder will require two cables running to it: One is the USB based power cable, and the second is for the connection to the video head. I just snaked these through the front instrument area of the bike, using zip ties to secure them. To keep the cables plugged in to the recorder, I found it necessary to use a rubber band to keep some tension on them so that don't come loose. Although this may seem a bit kludgey, it as worked out reasonably well for the two years I have been running with this so far, only having to change the rubber band about once a year :^)
The Innovv C3 recorder requires USB power for continuous operation. For the most flexibility I separately added a USB power receptacle on the handlebar of the bike. You can get weather resistant ones from Amazon or a motorcycle accessory store like CycleGear for about $15. The camera is then powered via a supplied USB power cable from the Innov recorder over to the USB receptacle. If I want the camera on, I simply plug the cable in, otherwise leaving wrapped around the handlebar with a zip tie to keep it from unraveling. This allows me to also use the USB socket for other accessories such as a GPS or for charging your phone while riding.
After installing the setup, it needs to be configured and updating of the firmware. To do this, the best approach is to connect to the recorder (with the lens head still attached) via the supplied USB adaptor cable to a notebook computer. On the notebook computer you will then need to download an application linked from the Innovv website. This was not very clear as the documenation for this camera is very sparse, but after some fumbling around via Google I found it here at: http://2kool4u.com/minicams/Ez_Configuration_C1.shtml
When you run this web based app it will provide the ability with directions on how to update the firmware and configure the camera. It is important to turn 'on' the 'Power on Record' setting via the configuration in order to enable the "dashcam" mode of operation. Although nice for cars for locking critical footage after an accident, you should also turn off the G-sensor to prevent the camera from automatically generating 'locked' files whenever the motorcycle goes over a big bump in the road. Otherwise your microSD card will eventually fill up after enough off-road rides over rough terrain.
One separate note about selecting the mode of operation with the Innovv recorder: To change modes manually from the buttons on the recorder, you must first press the shutter release button, and after that the mode button (marked 'M') becomes responsive. But if you just want to operate the camera in "dashcam" mode as setup with the configuration application, then you do not need to do anything here, as the camera will automatically go to video recording mode and start video capture.
As mentioned previously, I installed this camera on the bike about 2 years ago, shortly after the successful installation on the F800GS. Today, both installations are still running fine, capturing a lot of useful footage of my various rides. The camera and bike have taken quite a beating, having crashed multiple times in the dirt and mud, but the installation is not much worse for wear, only require a readjustment if the mount gets tweaked due to an impact. It also seems to handle water from both the weather as well as a washing with no issues. Some trips have been posted in my various ride articles such as this one in the Sweetwater Mountains last year here. In general I have been happy with the results. Although the quality is not quite as good as the GoPro in terms of clarity, it is descent and quite useable, especially for posting to the web such as YouTube. The main challenge tends to be to keep the camera lens clean of dirt and bugs. I find that it is helpful to reach down and wipe it with your gloved hand every once in a while when riding through dusty conditions in order to maintain clearer video footage.
- Stephen Fischer